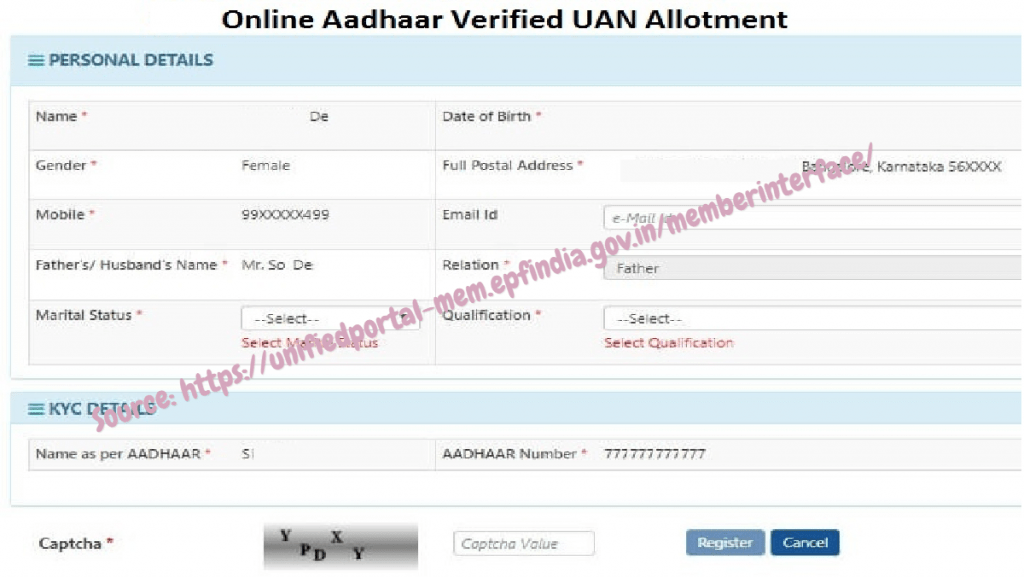
Procedure on how to check the Online Aadhaar Verified UAN Allotment in unifiedportal-mem.epfindia.gov.in website….
If you are an employee, you must be aware of what UAN is? If you are unaware of what it is, let me help you with that. Actually, UAN is a 12 digit number, which is given to the employees of any organization by the EPFO (Employee Provident Fund Organization. Do you know that UAN has been made mandatory for employees? Are you aware of the fact that you can generate the UAN yourself? If you are not, let me clarify you that, if you have Aadhaar, you can easily generate the UAN for yourself. We are already discussed in previous article which is on how to Link your UAN with Aadhaar in iwu.epfindia.gov.in/eKYC website.
At that time, many organizations faced difficulties with the new joiners or this reason. The new way of generating the UAN with the help of Aadhaar has simplified this process to a great extent. If you are joining a new organization, just demand the ‘Form No. 11 – Declaration Form’. This helps to furnish the existing UAN. In case, you don’t have the UAN, you can generate the UAN and the process is not complicated as well.

Online Aadhaar Verified UAN Allotment in unifiedportal-mem.epfindia.gov.in
The process to self-generate the UAN Allotment with the help of your Aadhaar is as such:
- Open your most preferred web browser and visit EPFO’s Unified Member Portal. To do this, simply enter link on the search address bar.
- You will be redirected to the login page of EPFO’s Unified Member portal. Here, you will see the important links option that is below the login page.
- The important links options contain details like Activate UAN, Know your UAN Status and Online Aadhaar Verified UAN allotment.
- Click on ‘Online Aadhaar Verified UAN allotment’ link. This action will open a new page on the screen of your device.
- Next, correctly fill in your Aadhaar Number in the space set aside for this detail.
- Click on “Generate OTP” button after filling in the Aadhaar Number.
- A One Time Verification Pin (OTP) will then be sent to your registered mobile number. You must enter the OTP correctly.
- After filling in the OTP, click on “Submit” button after which you will be redirected to another page on the site from where you can see the basic details available against the Aadhaar number.
- Verify all the details before also filling in the mandatory details correctly.
- Enter the captcha code that is displayed in the image. Alternatively, click on “Refresh” button to generate a new captcha before typing it in correctly.
- Finally, click on “Register” button after selecting the box in the disclaimer section. Your UAN will then be allotted and displayed as a message to the user. You have now successfully registered your EPF UAN.
Note: In case, you have already linked your UAN Allotment with the Aadhaar and if you are unaware about it somehow, you will get the notification for the same as well. The notification will be in the form of an alert, saying in the red text that ‘Aadhaar number already linked to UAN
